Adding Employees
Add employees to your organization so they can receive perks and benefits through PerksPe.
Two Ways to Add Employees
| Method | Best for |
|---|---|
| Manual Entry | Adding a few employees one by one |
| File Upload | Adding many employees at once (bulk import) |
Method A: Manual Entry
Step 1: Go to Employees
From the sidebar, click Employees.
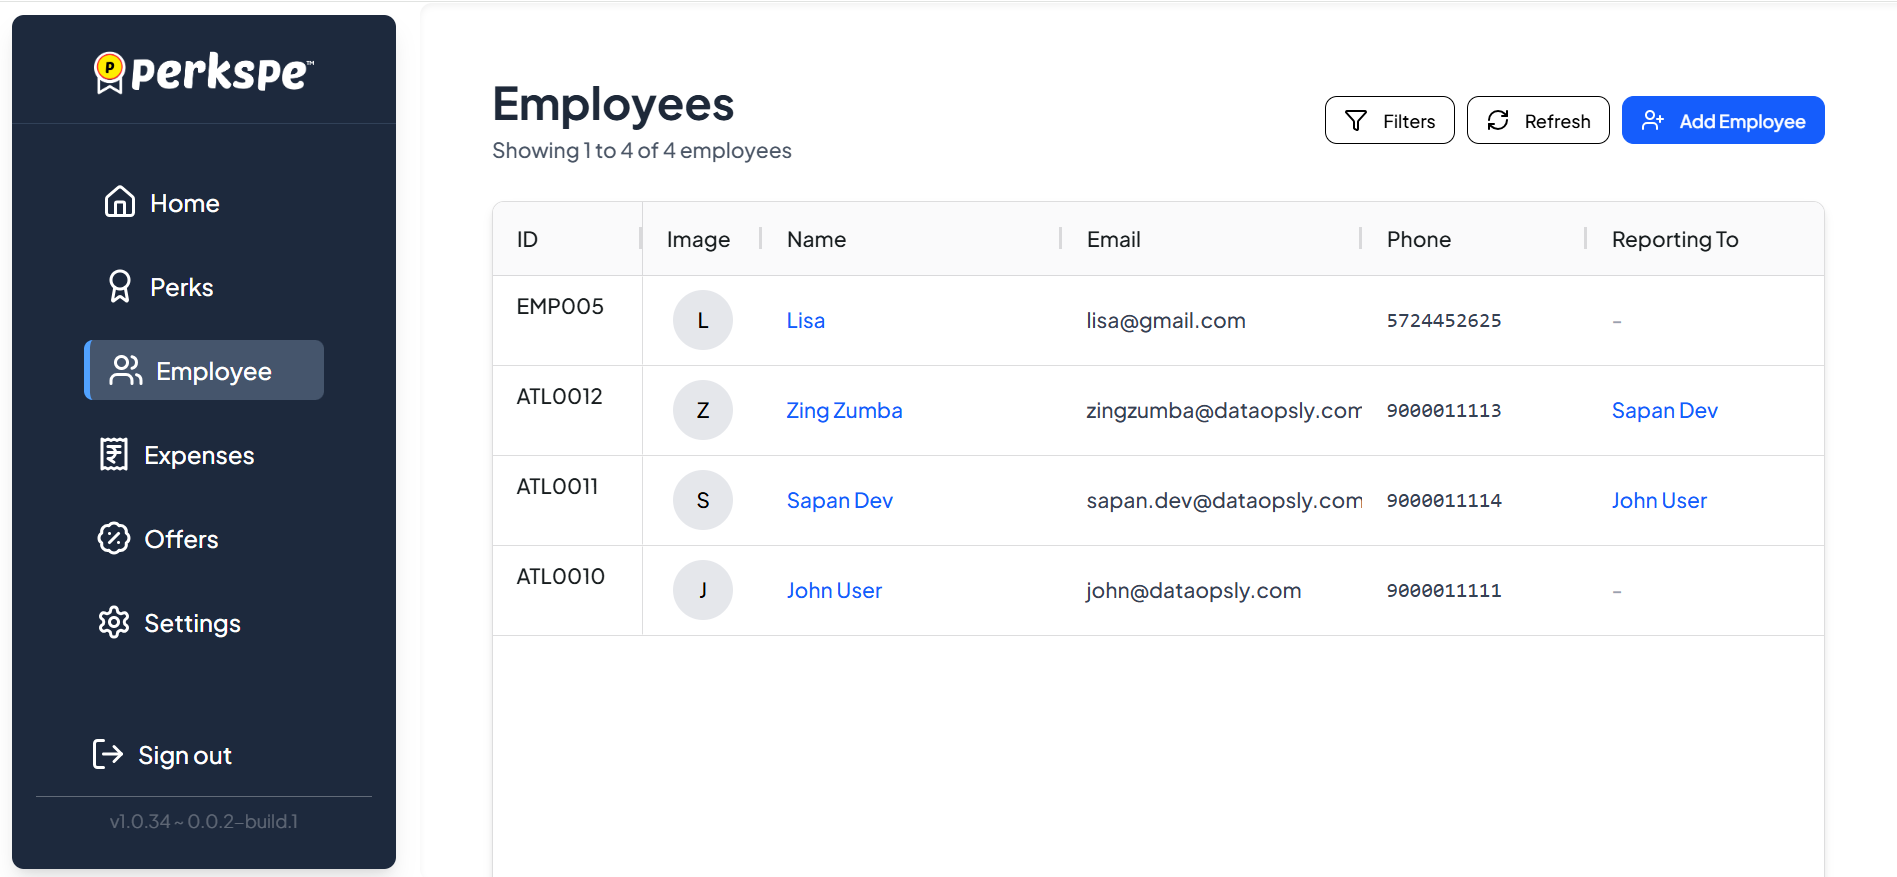
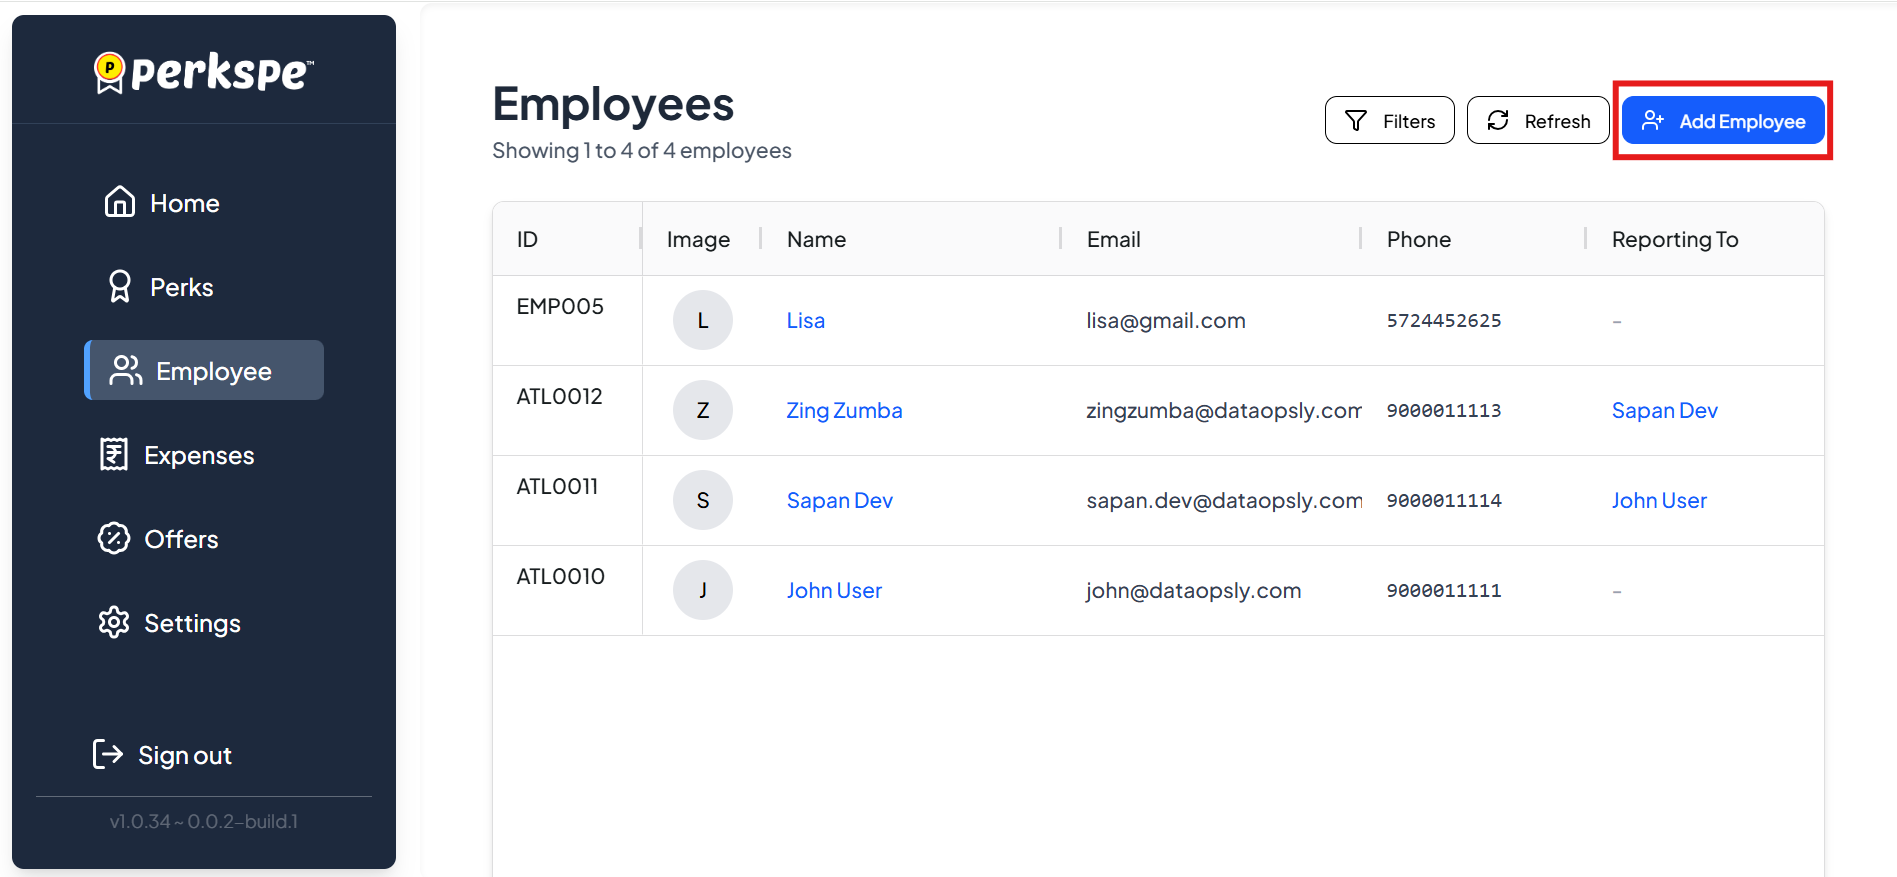
Step 2: Click Add Employee
Click the Add Employee button (top right).
Step 3: Fill Employee Details
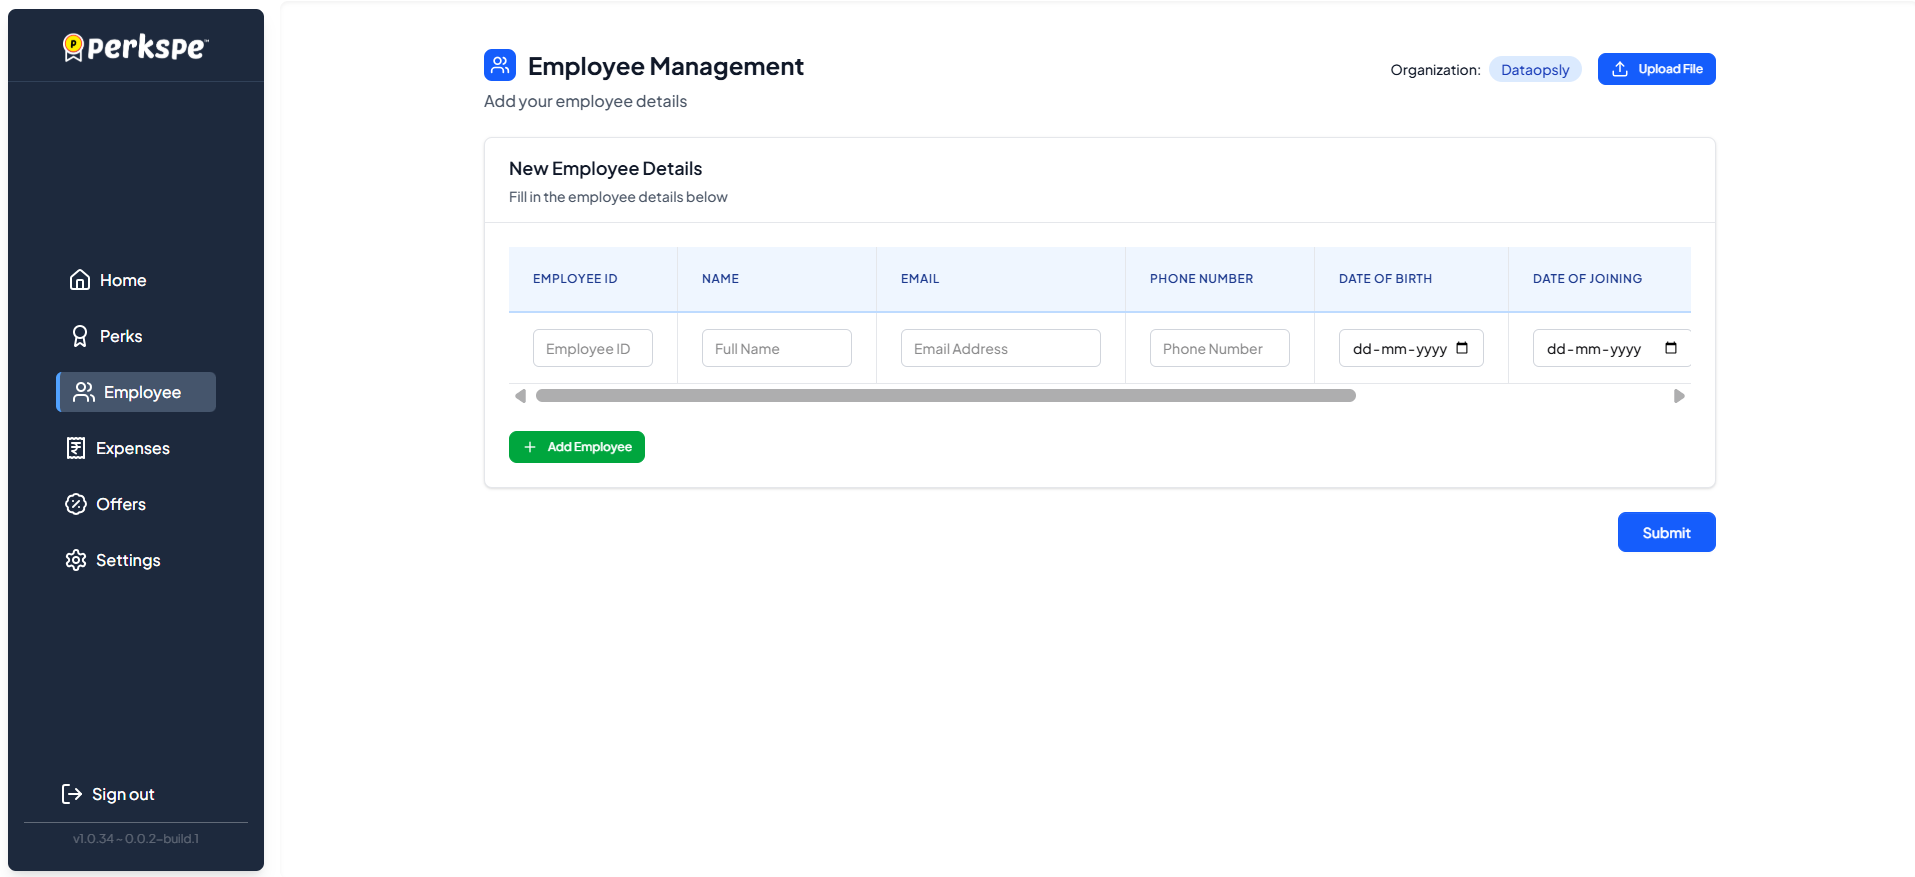
Enter the following information:
| Field | Format / Notes |
|---|---|
| Employee ID | Your internal ID for this employee |
| Full Name | Employee's complete name |
| Work email address | |
| Phone Number | Mobile number |
| Date of Birth | DD-MM-YYYY |
| Date of Joining | DD-MM-YYYY |
| PAN Number | PAN Number |
| Marital Status | Single / Married |
| Portal Access | Yes = employee can log into PerksPe portal |
Step 4: Add to List
Click the + Add Employee button to add this employee to the list.
![]()
You can add multiple employees before submitting.
Step 5: Submit
Once all employees are added, click Submit.
![]()
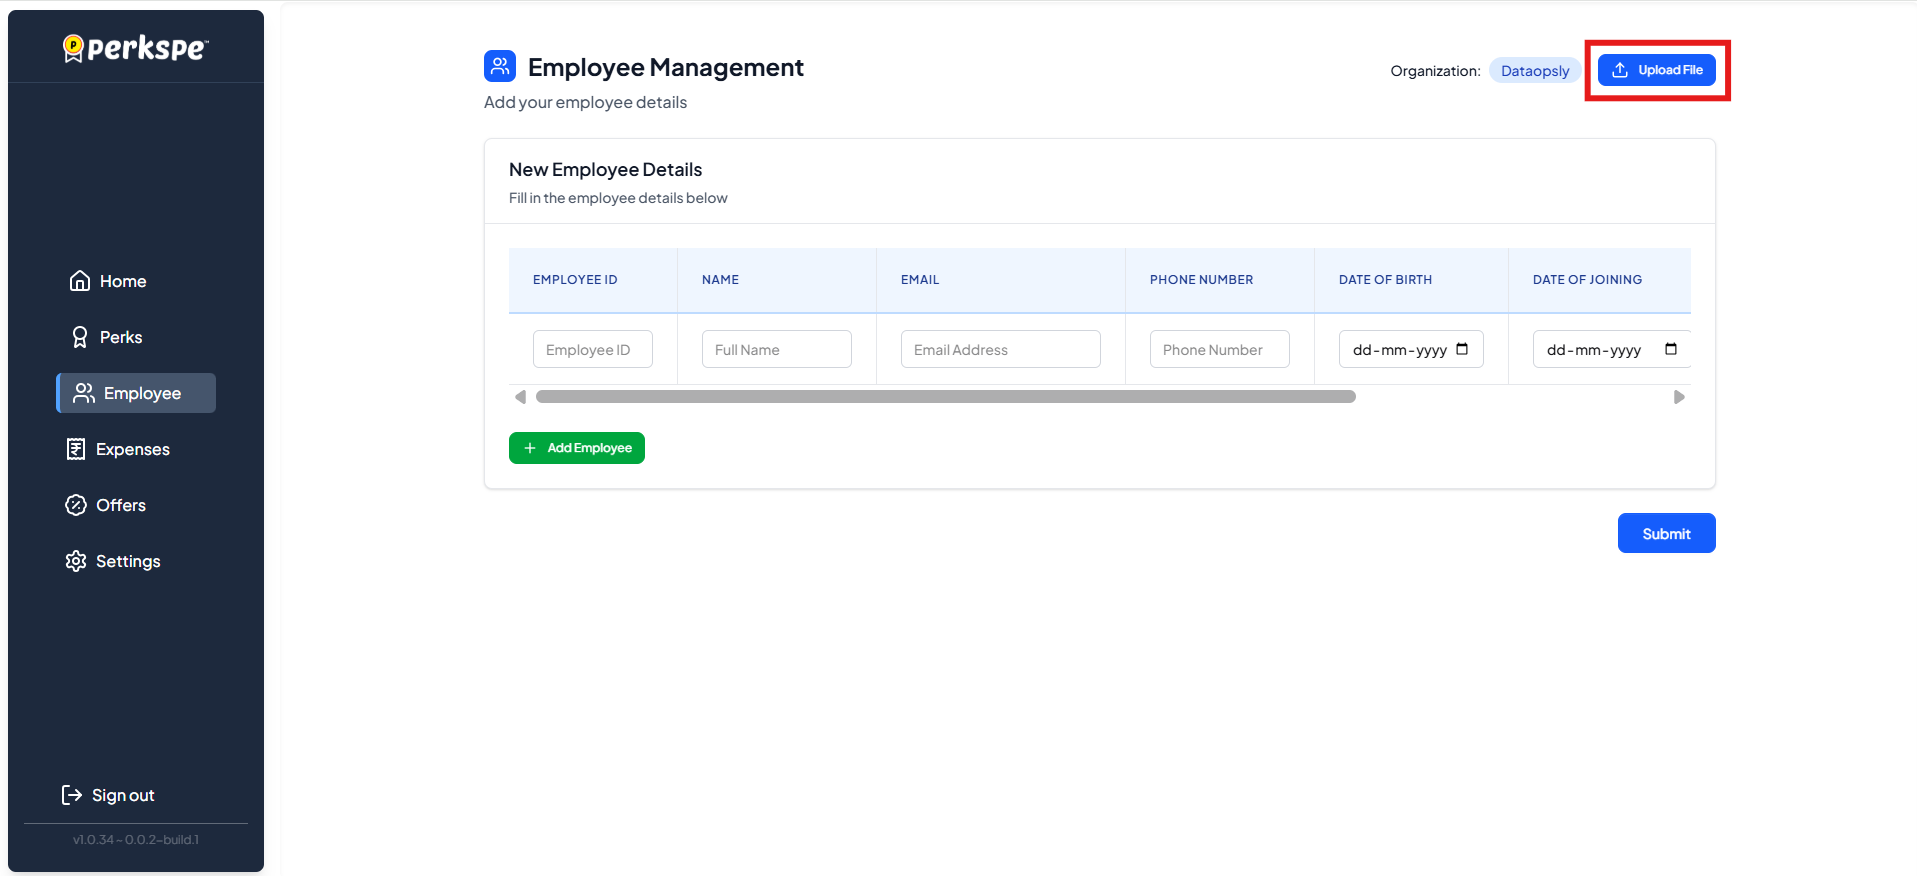
Method B: Upload File (Bulk Import)
Step 1: Click Upload File
On the Employee Management screen, click Upload File (top right).
Step 2: Download Sample CSV (Optional)
Click Download Sample CSV to get the correct file format.
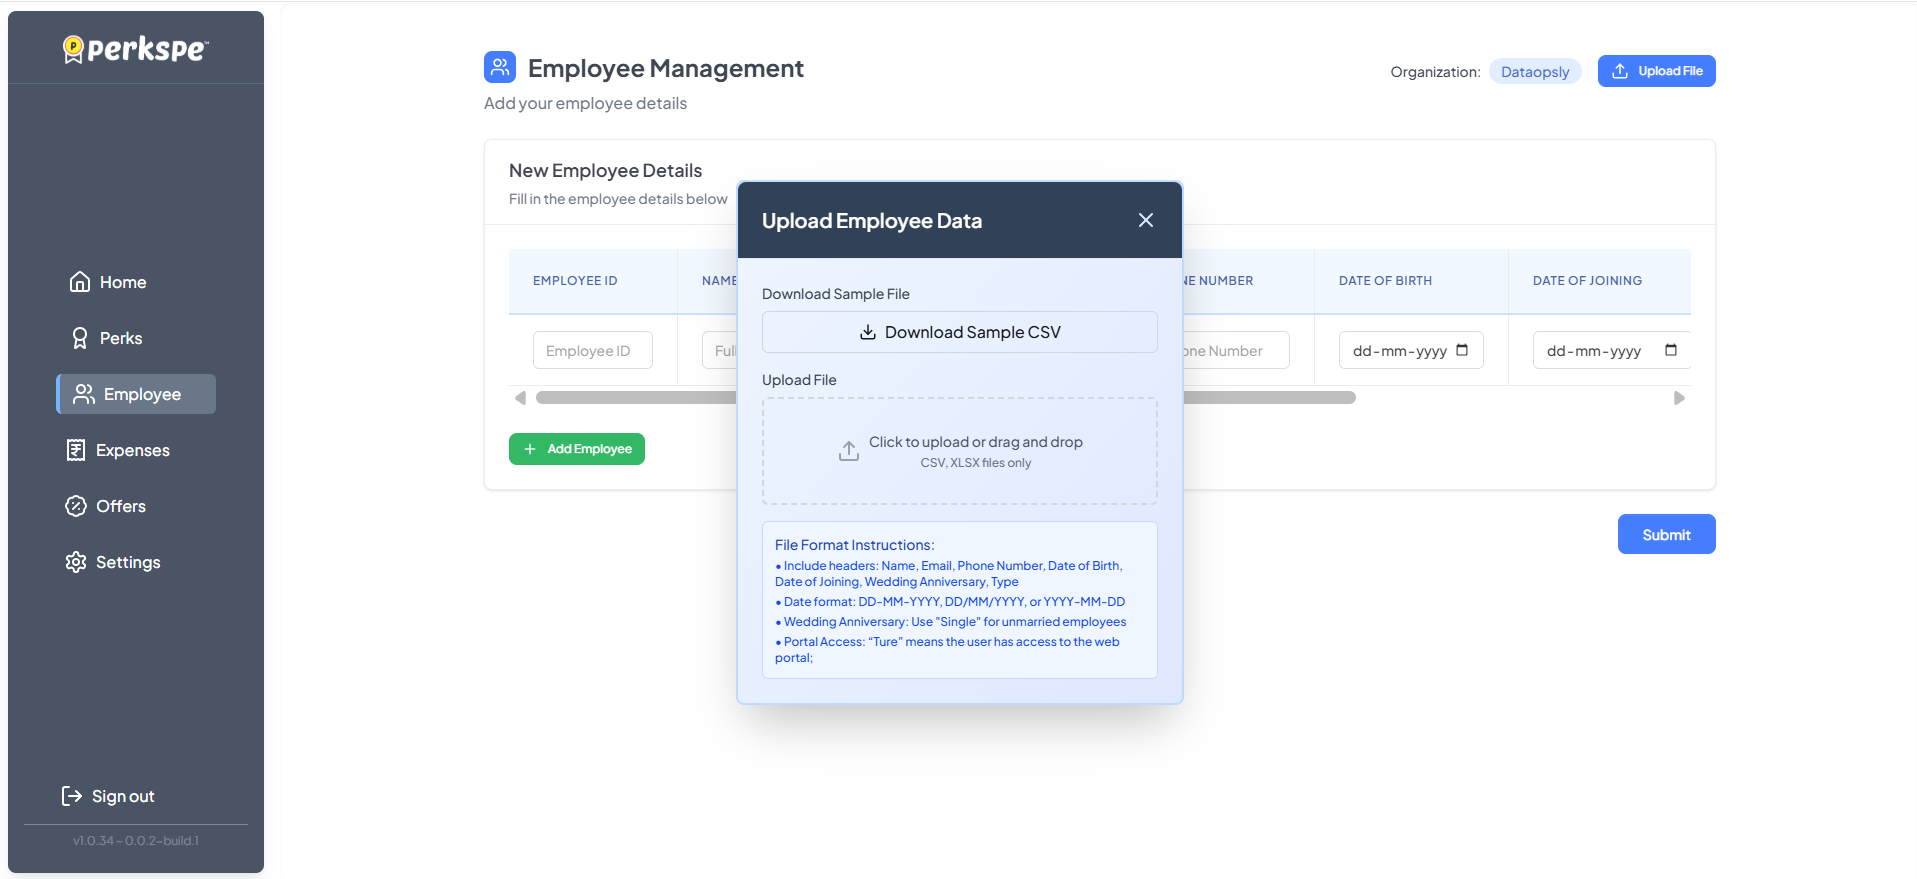

Step 3: Prepare Your File
Your CSV or XLSX file must have these columns:
| Column | Required | Notes |
|---|---|---|
| Name | ✅ | Full name |
| ✅ | Work email | |
| Phone Number | ✅ | Mobile number |
| Date of Birth | ✅ | DD-MM-YYYY, DD/MM/YYYY, or YYYY-MM-DD |
| Date of Joining | ✅ | DD-MM-YYYY, DD/MM/YYYY, or YYYY-MM-DD |
| PAN Number | ✅ | PAN Number |
| Wedding Anniversary | Optional | For anniversary perks |
| Type | ✅ | Employee type |
| Portal Access | ✅ | Set to "True" for web portal access |
Step 4: Upload & Submit
- Drag and drop your file, or click to browse
- Review the imported data
- Click Submit
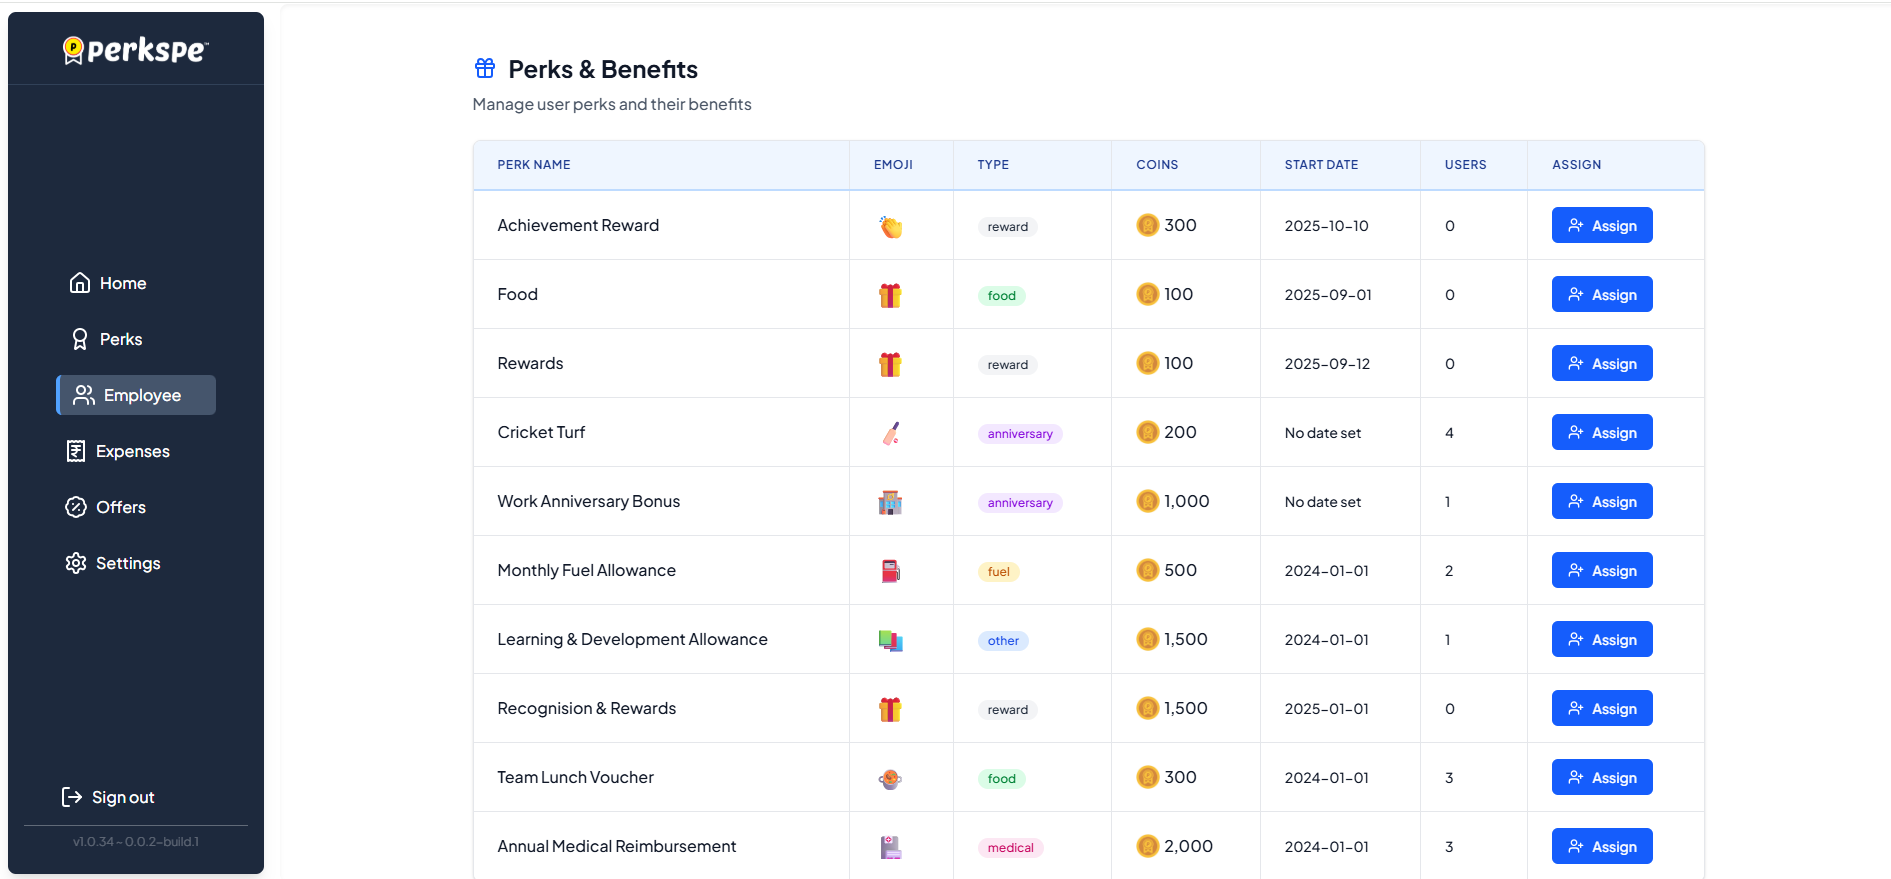
After Adding: Assign Perks
Once employees are added, you can immediately assign perks to them.
Step 1: Click Assign
Click the Assign button next to the perk.
Step 2: Select Employees
A popup appears. You can:
- Use the search bar to find specific employees
- Check individual employees to select them
- Use Select All to choose everyone
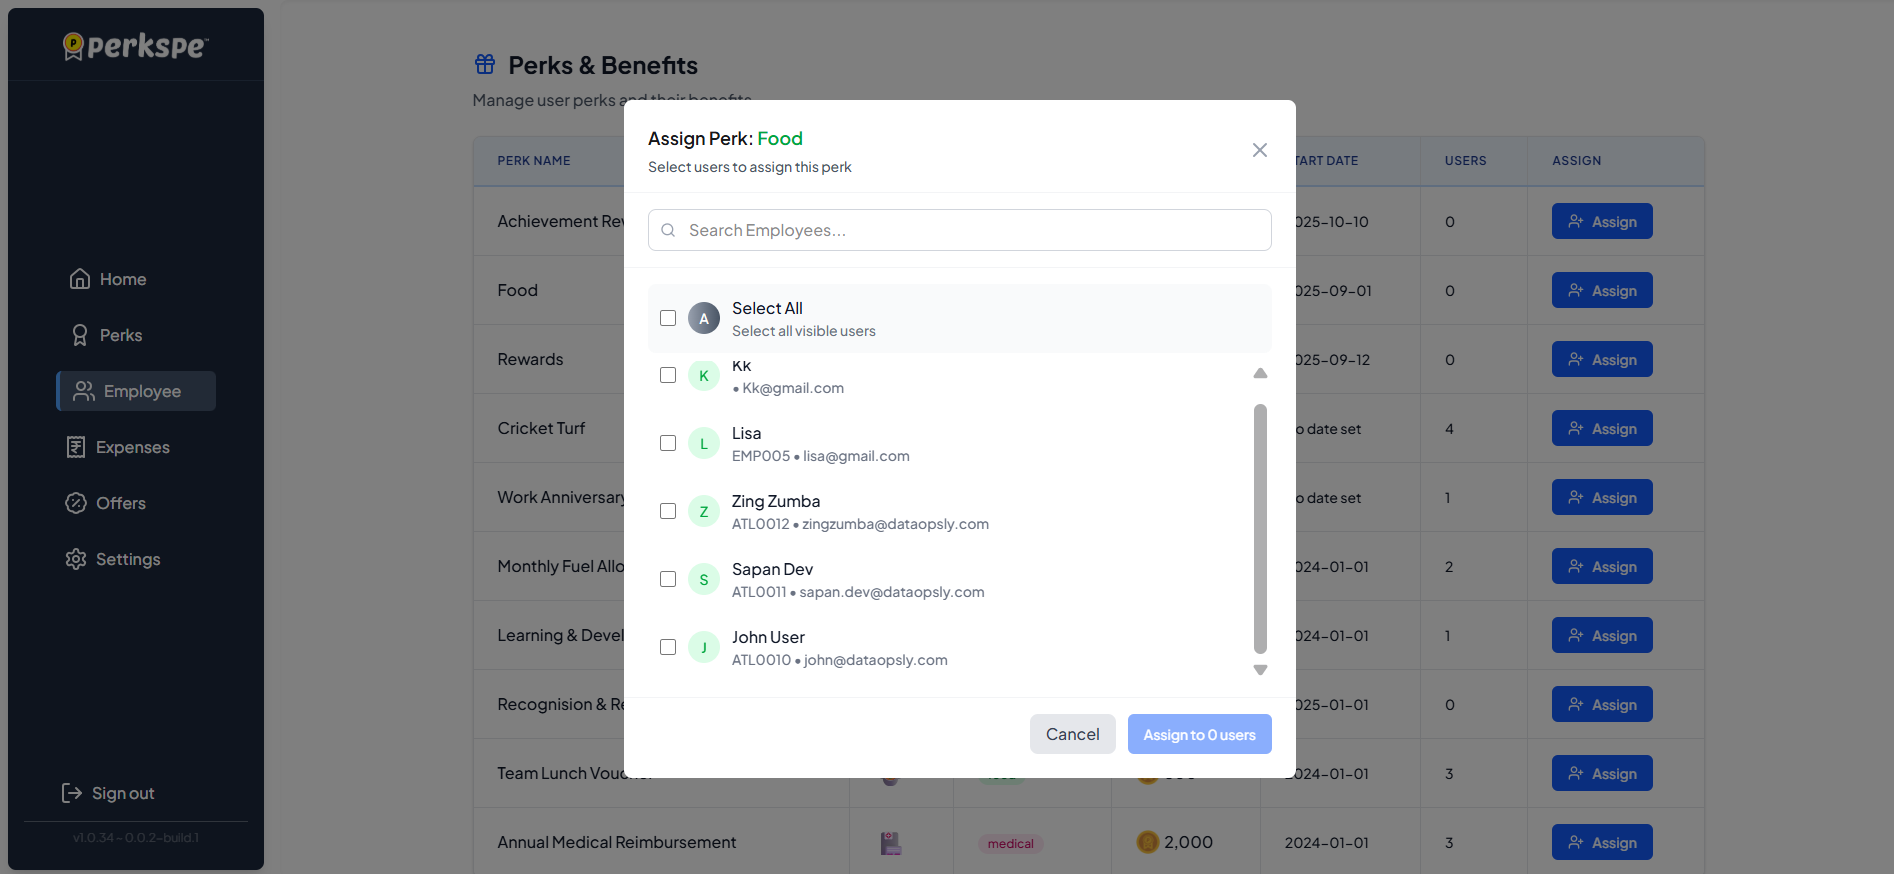
Step 3: Confirm Assignment
Click Assign & Allocate to complete.
Scroll down and click Submit to finish.

View Employee List
The main Employees screen shows all employees in your organization.
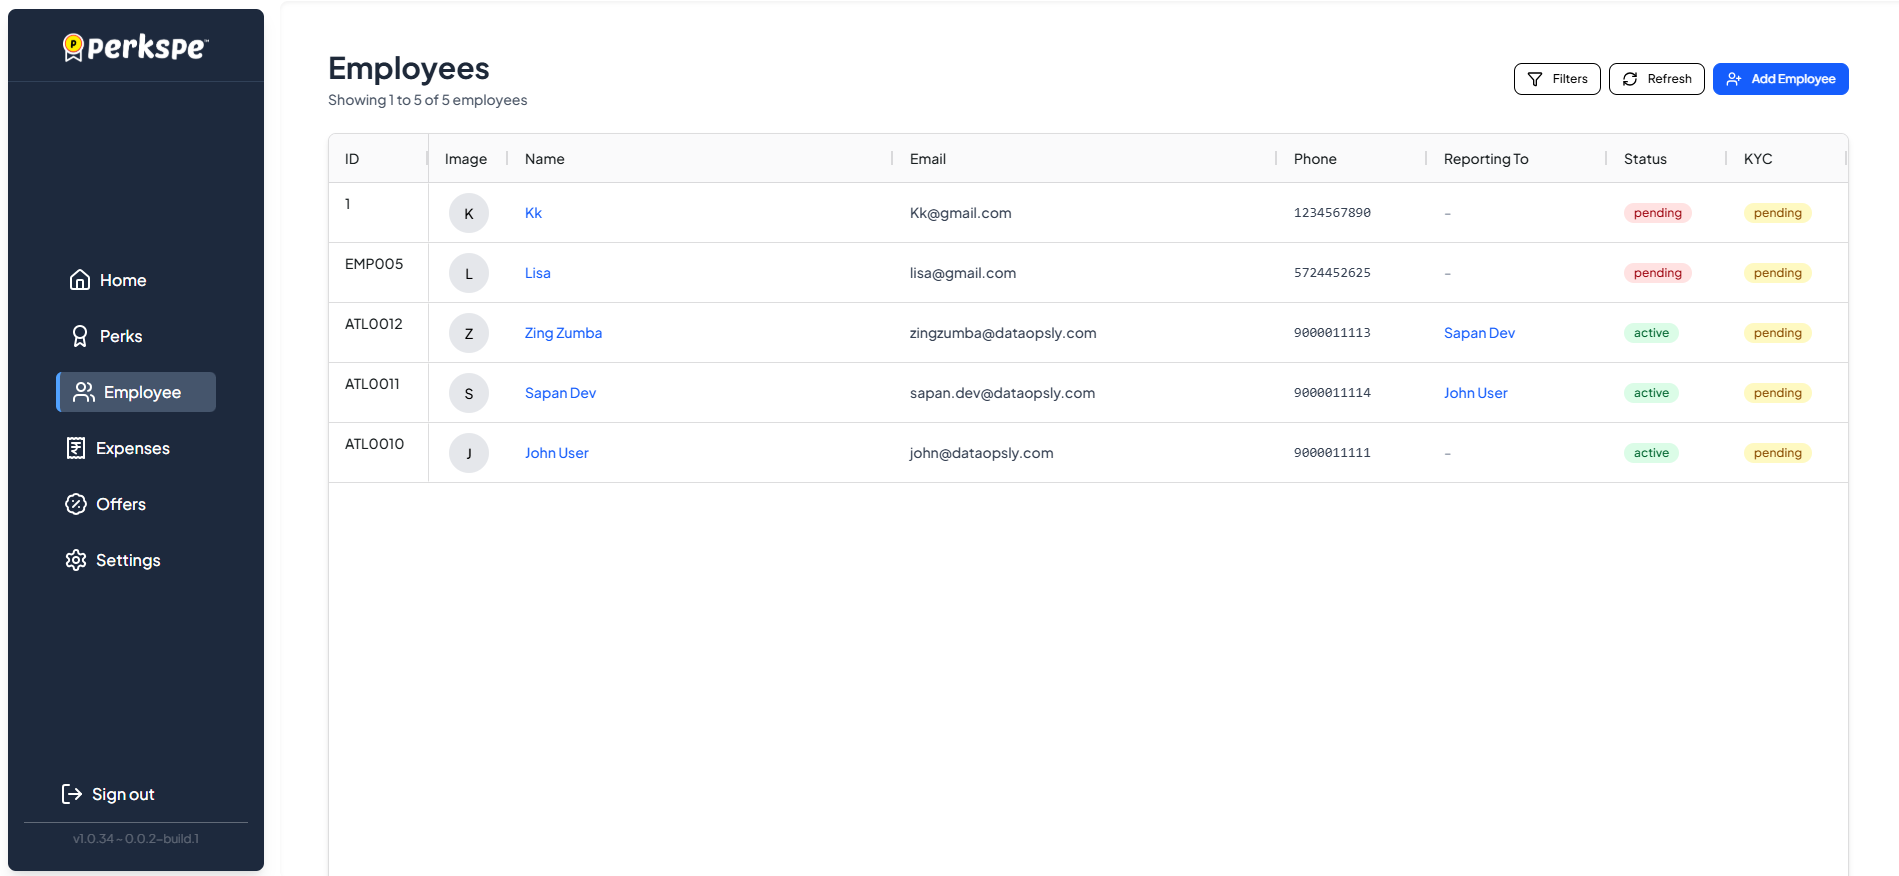
You can see:
- Employee name and contact info
- Current status (Active / Inactive / Closed)
- Assigned perks and roles
Quick Summary
| Task | Steps |
|---|---|
| Add one employee | Employees → Add Employee → Fill details → Submit |
| Add many employees | Employees → Upload File → Upload CSV/XLSX → Submit |
| Assign perks after adding | Click Assign → Select employees → Assign & Allocate |
Editing Employee Details
You can modify an employee's personal information after they have been added to the system.
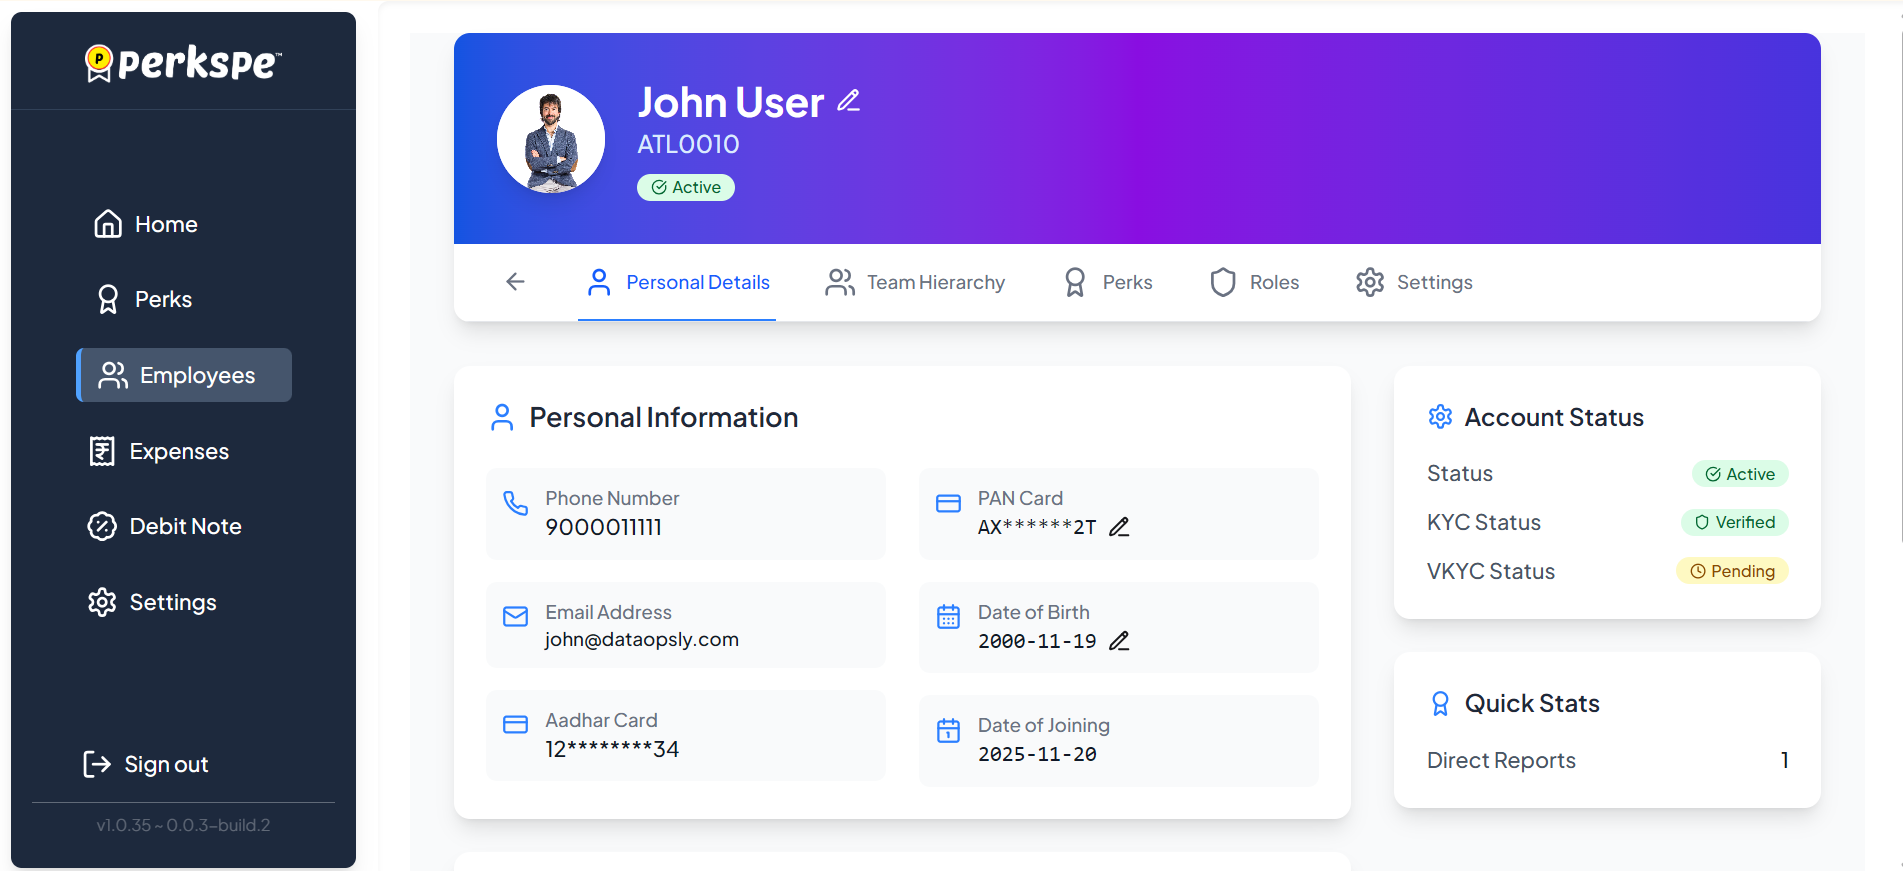
How to Edit:
- Navigate to the Employees list and select the employee.
- In the Personal Details tab, look for the edit icon (✎) next to the fields.
You can edit the following fields:
| Field | Description |
|---|---|
| Full Name | Click the edit icon next to the employee's name in the header to update. |
| PAN Card | Click the edit icon next to the PAN number to modify tax details. |
| Date of Birth | Click the edit icon next to the birth date to correct age information. |
Some fields like Date of Joining and Aadhar Card cannot be edited.
Employee Perks Tab
The Perks tab in an employee's profile displays all perks assigned to that employee. You can view this information in two formats.
Table View
The Table View shows perks in a list format with detailed information:
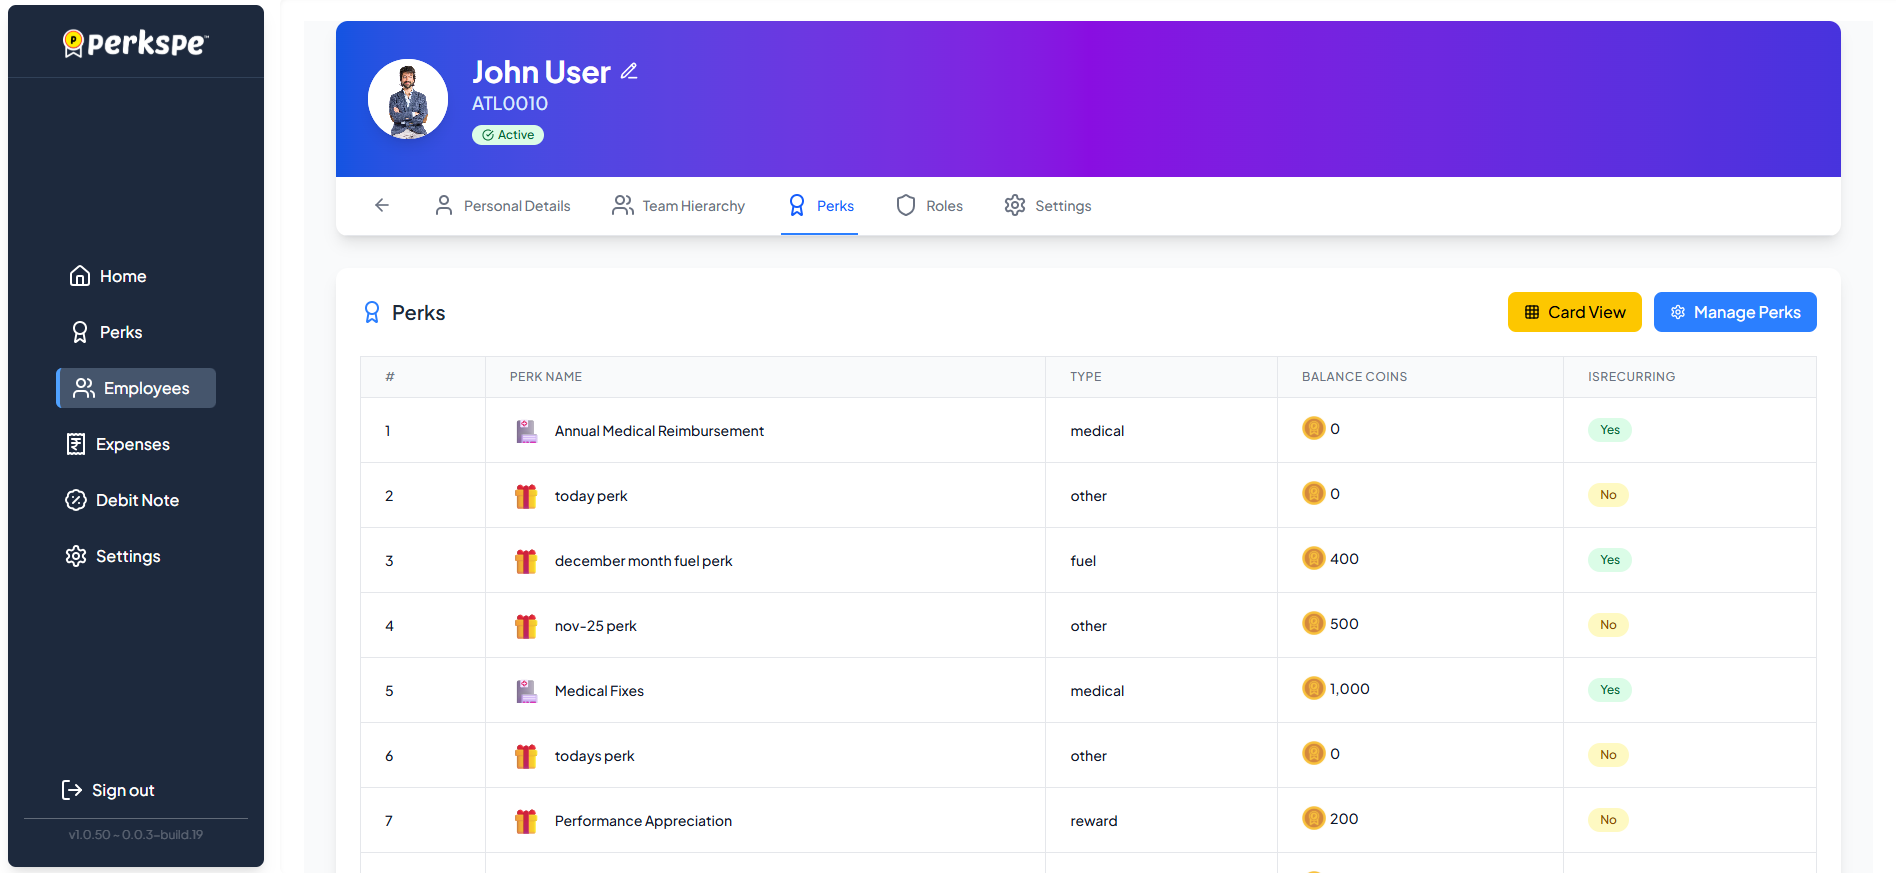
| Column | Description |
|---|---|
| # | Serial number |
| Perk Name | Name of the assigned perk |
| Type | Category of perk (medical, fuel, other, reward) |
| Balance Coins | Available coins for the perk |
| Is Recurring | Whether the perk recurs monthly (Yes/No) |
Click the Card View button to switch views, or Manage Perks to modify assignments.
Card View
The Card View displays perks as visual cards grouped by type:
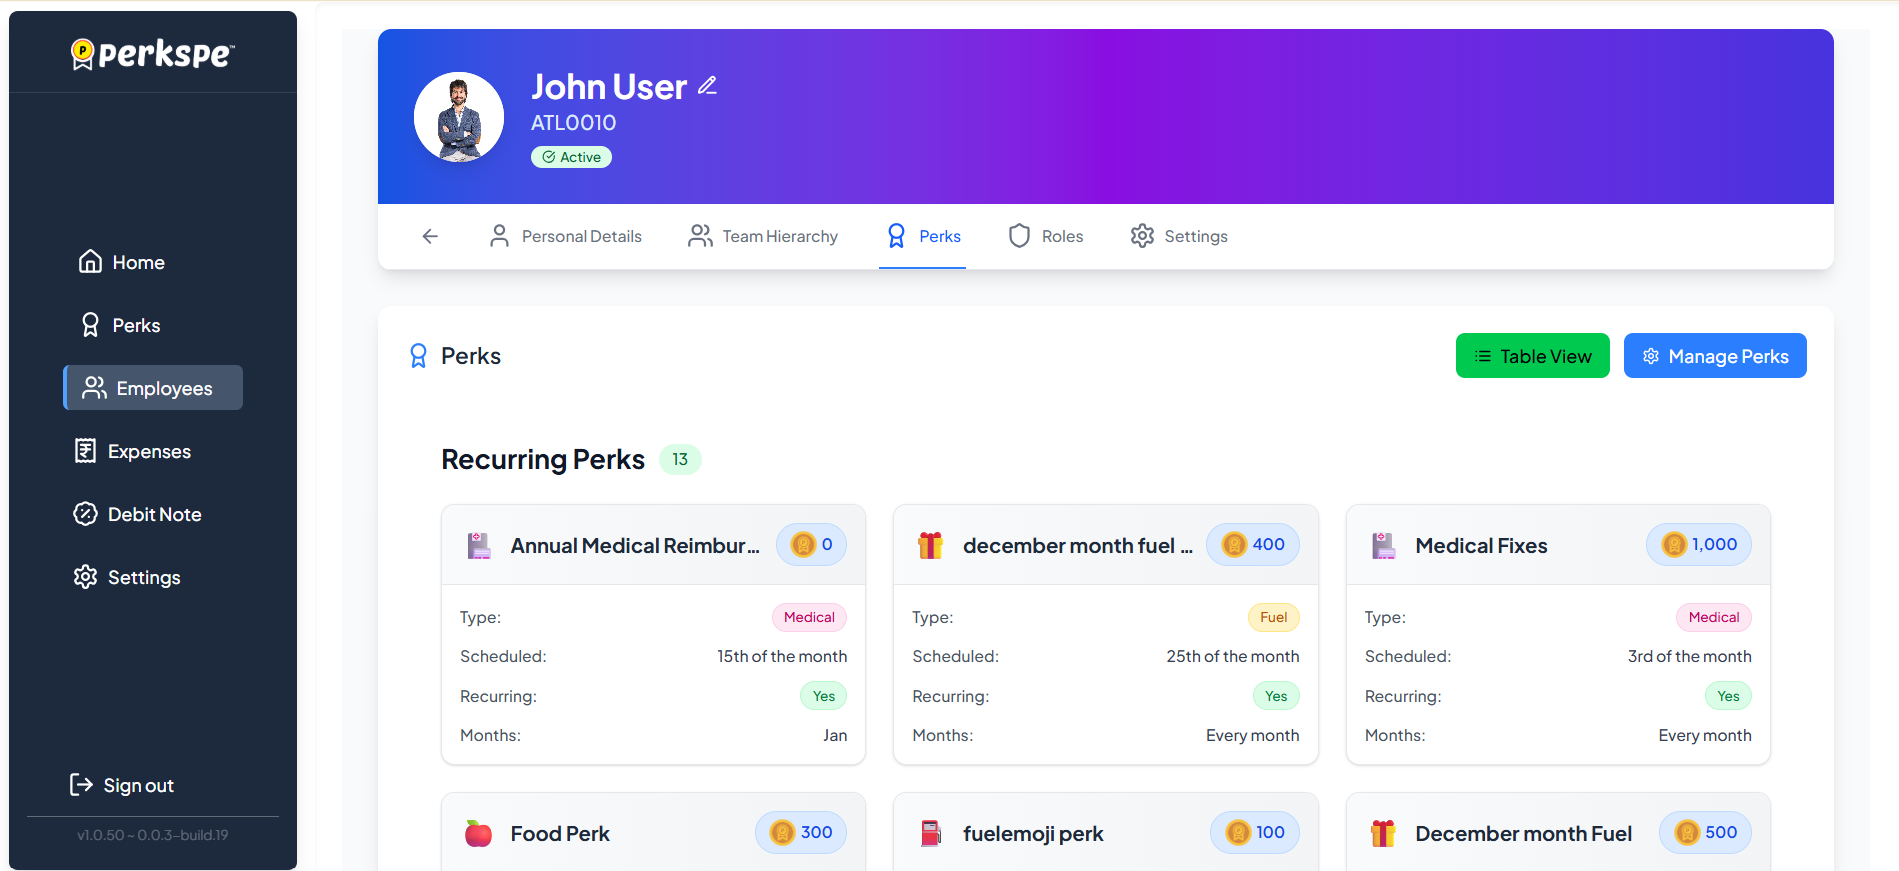
Each card shows:
- Perk Name with icon
- Balance Coins (displayed prominently)
- Type badge (Medical, Fuel, etc.)
- Scheduled date for the month
- Recurring status (Yes/No)
- Months (specific month or "Every month")
Use Card View for a quick visual overview of perks, and Table View for detailed information and sorting.